In my home lab in order to simulate what a customer will be using to run Azure resources and also access them from on prem over a VPN. In my lab I am using Ubiquiti USG-3P. I ended up using all Ubiquiti equipment in my home lab and love it. Setting up the VPN was not that difficult, enough of that, lets get into it.
First lets build the Azure Side we will need a few things configured. The list is as follows,
Virtual Network and a subnet
Virtual Network Gateway
Local Network Gateway
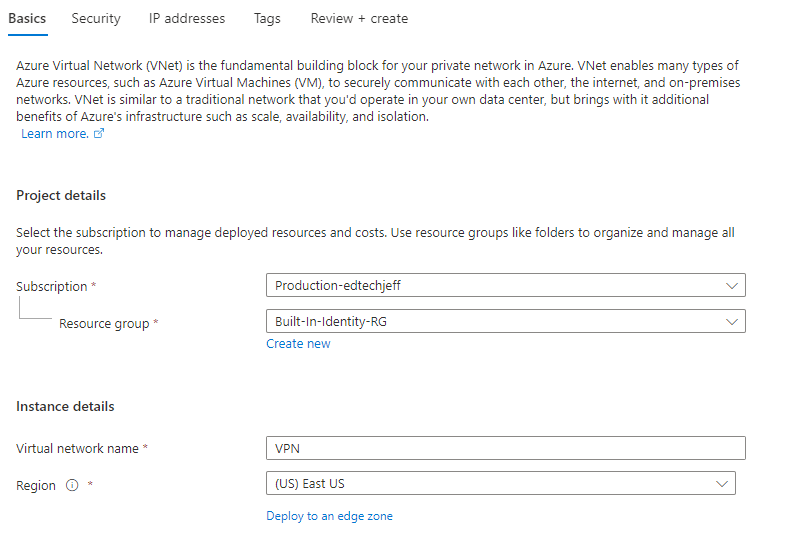
Log onto the Azure portal and search for Virtual Networks

Next Click on Create, we will need to fill in the Basics Page
Click Next and Next again unless you want to add extra security to this VNET.
This section is the network and subnet that you want in Azure. There are a couple of different thoughts on this. I created a vnet that was the same as my home network and then created a different subnet that did not conflict with my home lab network. I am treating this as just an extension of my network. I have also discussed this with others that will create a totally different network and subnet and this does make it easier to identify where the traffic is coming from. Its all up to you. Again I choose to do Option 1.
First lets create the network. I am creating a 192.168.0.0/16 network again matching my homelab.
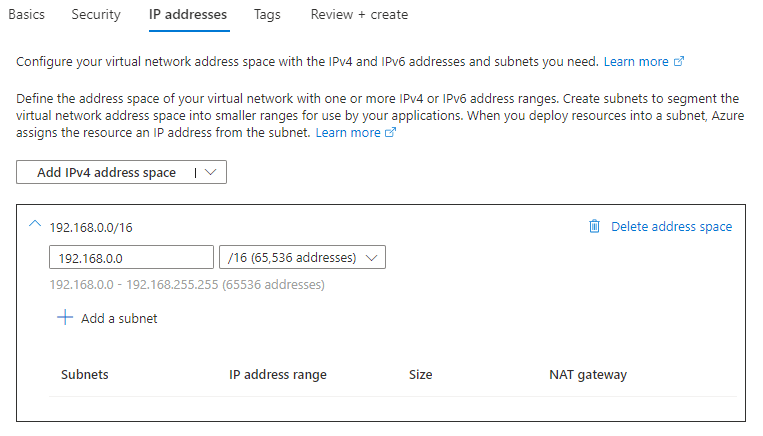
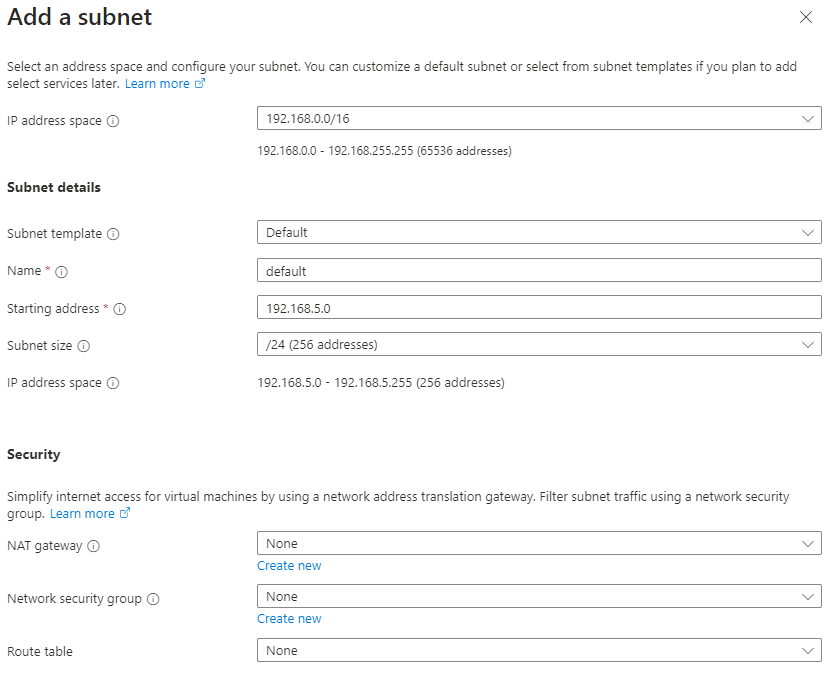
After you do that, you next create a subnet. I did have one in there already by default but I deleted it because it did not match my IP Schema. Click on the Add a Subnet. Here you will fill in the correct subnet information you want on the Azure side. Again this one does not conflict with my on-prem environment. Click add when you are done. Click Next
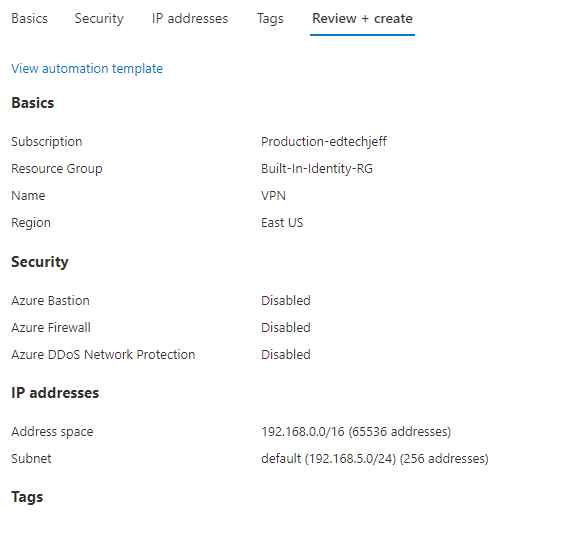
Add Tags your tags and then click review an create.
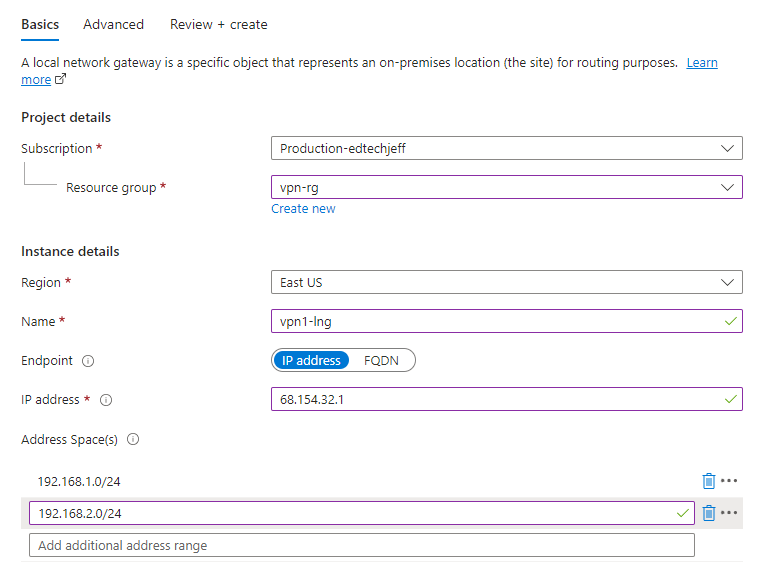
Next search for Local Network Gateways and click on create
This one is really just one screen but very important. Let me explain the below screen shot. of course choose the subscription and resource group and the region. Give it a name, and choose either IP Address or FQDN for endpoint. I choose IP address put in my public IP address I get at home. The last part is important these are the on-prem networks that you want to allow over the VPN. In my home lab I have it setup so that LAB equipment goes over the VPN but not my private equipment goes over the VPN. Click Review and create and you are done with that section, lets move onto Virtual Network Gateway.
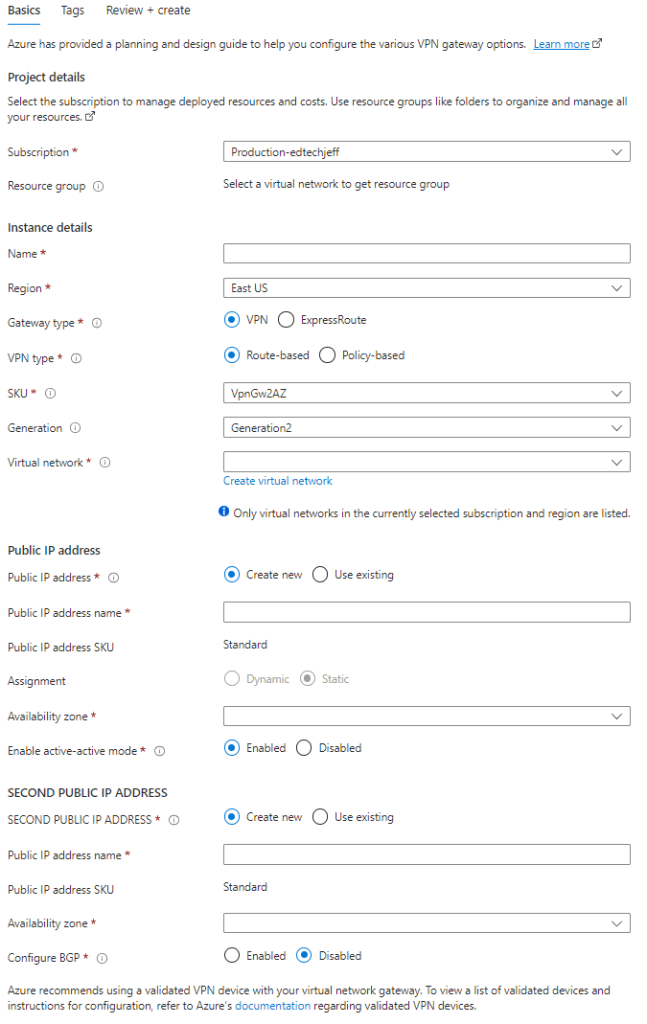
Click on search in Azure and find Virtual Network Gateways and click create. Now this part has the most information to fill in. I did choose in my home lab the cheapest VPN I could get.
Instance Details
Name
Region
Gateway Type
VPN Type
SKU
Region
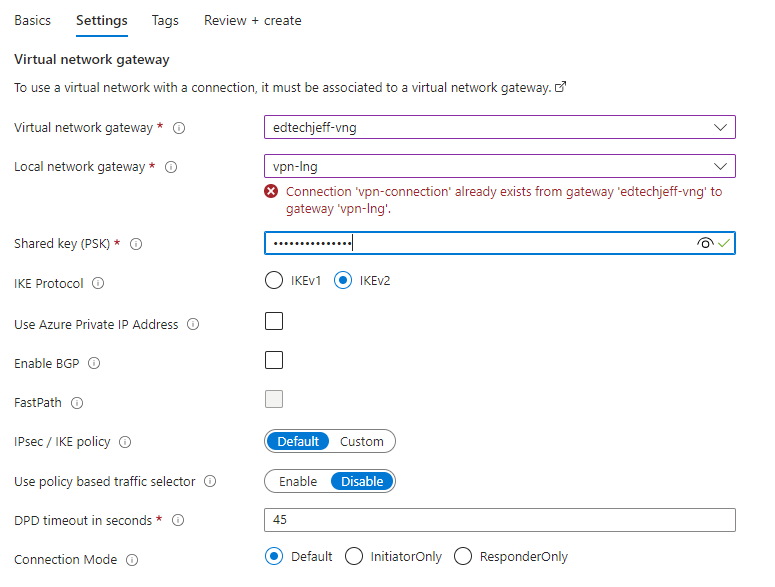
After you have created the Virtual Network Gateway you need to open it up and click on connections and click add. Most will be filled in. You will need for the purpose of this post change the Connection Type to Sit-to=Site and also give it a name. Once you have filled it in, click next

On this screen you will need to select the Virtual Network Gateway and also the Local Network Gateway. Here you will set the Shared Key for the VPN. I also leave IKE Protocol set to v2. You can now click review and create.
One other piece of information you will need for the next stop is the Public IP on the Azure side. You will get that after you open up the Virtual Network Gatewa and click on the Properties blade. Please note the IP Address
Now we have completed the Azure side lets flip over to the firewall
Log onto your USG and go into settings by clicking on the Gear ICON
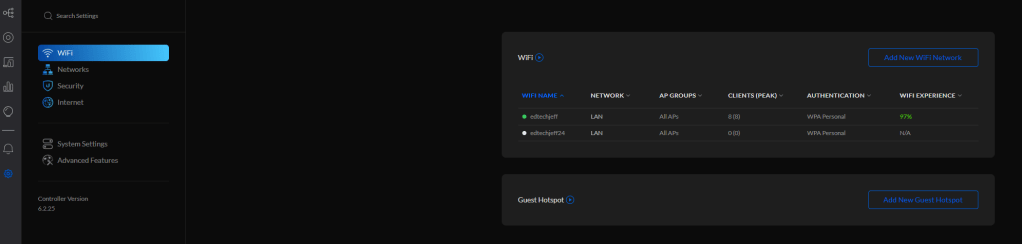
Next click on the Networks Tab
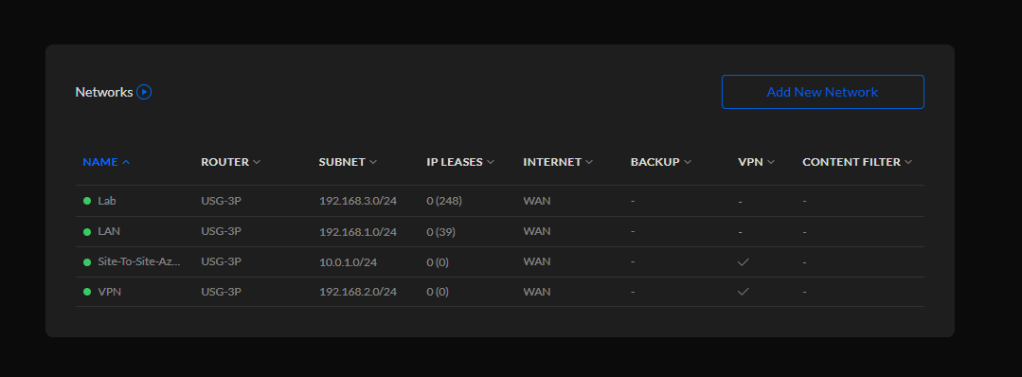
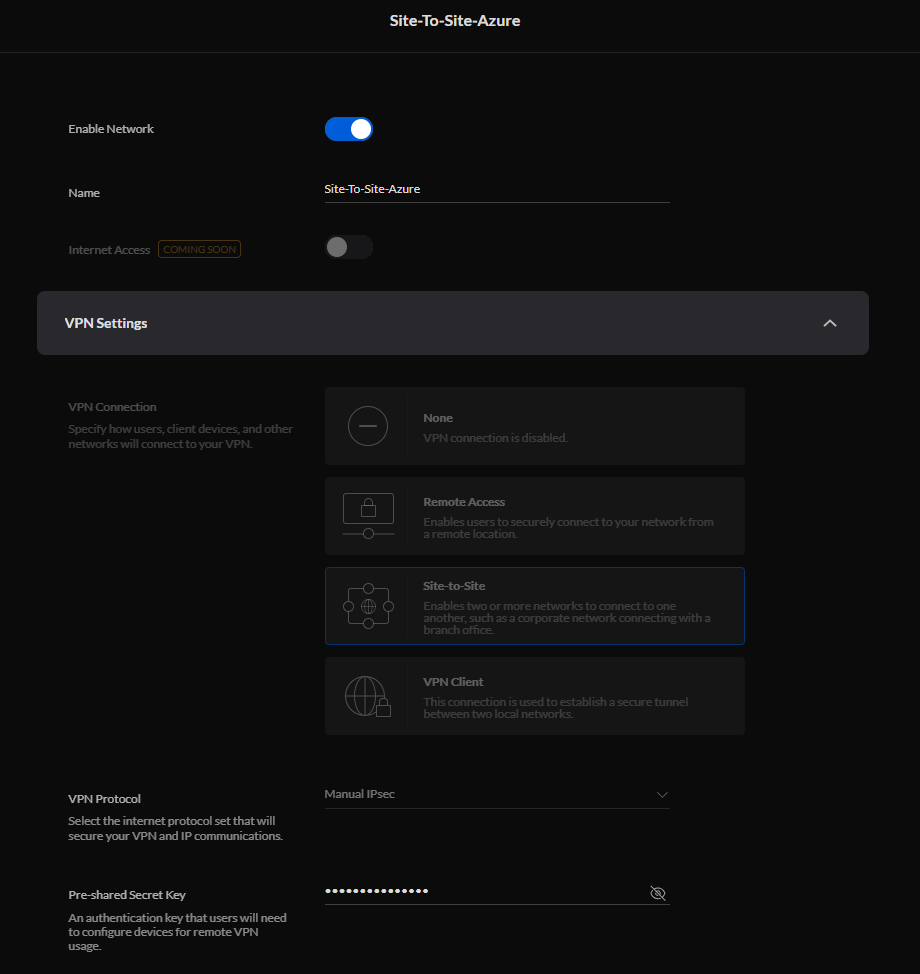
Here we will click on Add New Network. This screen has multiple boxes you need to fill in. Name your connection and under VPN Settings click on Site-to-Site. Set the VPN Protocol to Manual IPsec and also the same Pre-Shared key that you set in Azure use it here also.
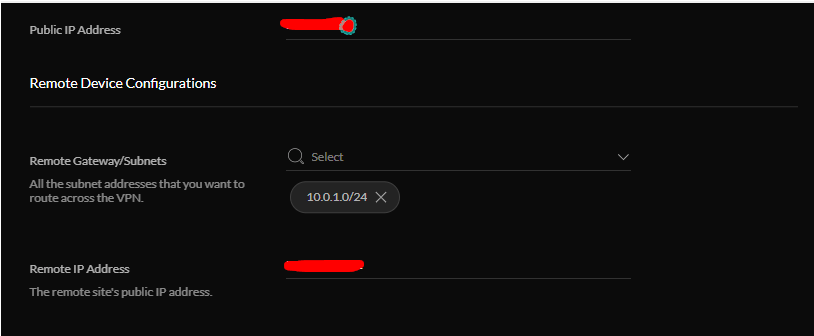
Next set the Public IP address your clients get on your side and set the Subnets you want to route over the VPN. Again I do not want all my traffic just my lab machines. Also set the Remote IP on the Azure side you have recorded from the Virtual Network Gateway.
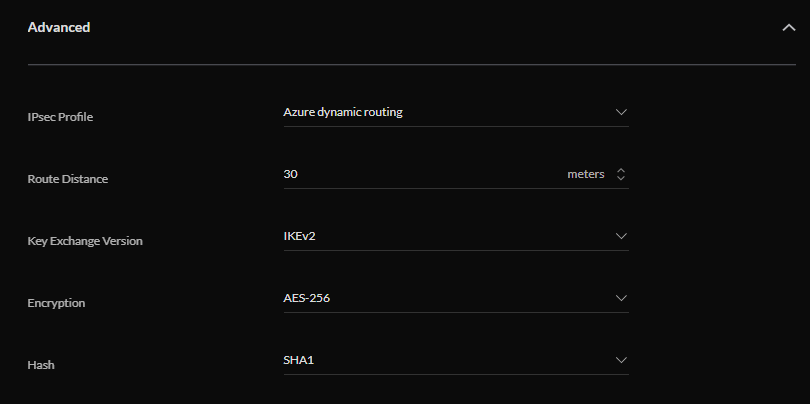
Under Advanced the settings should look like the below screenshot.
Once you have completed these steps you can go back to Azure, and open up the Virtual Network Gateway and click on connections. After a few minutes the status should change to Connected.

I hope this helps you like it helped me. Now you know how, try it for yourself.
